")

Table of Contents
Kryptex
Kryptex mining software is fairly easy to use and is now quite easier to navigate after the recent update. The cryptocurrency payout itself is a little low but the software setup is easy and mining is simple. One of the best features of the software is the Litecoin mode function.
Pros:
Provides a clean GUI.
This application works efficiently even when your PC is idle.
You can withdraw Bitcoins or send money directly to a bank card.
Cons:
Cannot run the lite version with 1 GPU.
How to Use?
Step 1
Download the app. Kryptex will test your PC’s performance and estimate expected earnings.
Step 2
Create account. After signing up, you will have full access to your account.
Step 3
Keep Kryptex running. Use browser and other apps while Kryptex is running in the background.
Step 4
Get paid. You will start earning money the very same day you start mining.
Cudo Miner
The best part of Cudo Miner is that the software is free to use and install. The best attribute of this software is that it has a very intuitive interface that is easy to use and navigate. The profit earned by the software is also quite substantial as well.

Pros:
1. It offers an advanced hashing algorithm that allows more customized mining.
2. Helps you manage and monitor your device’s performance, health, power, and running status at your desk.
3. Provides security through multi-factor authentication.
Allows you to access it from the command-line interface.
Cons:
Withdrawal fees are slightly on the higher side.
How to Use?
Step 1
Firstly, go to www.cudominer.com click sign up and download. Cudo Miner supports Windows 7 or later (x64) , macOS 10.9+, Ubuntu 18.04, CudoOS and ASIC.
Step 2
Create An Account OR if you already have an account Enter your username and login. Sign up for a Cudo Account by entering your Email Address and Password or by using one of the alternative methods listed.
Step 3
Enter your Name and your Username (username automatically removes spaces ), this will be displayed in the Cudo web console and on the Cudo Miner Application. CLICK save to continue. Make a note of your Username and Password. You will then need to go to your emails and verify your account CLICK verify account and then continue.
Step 4
Welcome to Cudo Miner click the Get started button to proceed. The default payout coin is set to BTC you change this by going to settings > payment. Payout coins are BTC, Ethereum, Ravencoin, and Monero. For more info on mineable coins please visit this page
Step 5
Clicking the get started button will take you to the device setup page. where you can click on setup a device. This will bring up installation instructions for you to follow and install on your chosen operating system. Alternatively, when logged into the console go to the Devices tab and click Connect a device or Setup a device.
Step 6
Once you have installed you can start to configure your settings. The onboarding screen on the desktop app gives you the chance to choose your settings to get started with. You can choose to Enable Third-Party Miners to allow Cudo Miner to download closed source miners.
MVU Cloud Mining
NiceHash is packed with cloud mining features making it convenient while buying GPU equipment. As per many NiceHash reviews, it is a great place to make crypto mining highly profitable. It is also used to mine new altcoins and stable coins. NiceHash helps us gain success in our crypto journey effortlessly.

Pros:
1. This Litecoin mining program allows you to manage all your activities remotely.
2. This Litecoin miner app enables you to check mining status with ease.
3. It allows you to conveniently manage your profile.
4. NiceHash offers a profitability calculator.
Cons:
1. Litecoin transfer fees are higher than other popular mining software.
How to Use?
Step 1 – Registration on NiceHash
Find your way to the NiceHash.com website click the registration button and register on the website by entering your email and password.
Step 2 – Confirm your email address
You will receive an email with a verification code and link. You can use either method to confirm your email.
Step 3 – Getting Your Wallet Address
Once you have confirmed your email address you need to log into the account with your credentials. You will then be presented with the dashboard screen and the wallet code is highlighted in the image above. You need to remember this code as it is used in the NiceHash miner program to link the miner to your account. Without this code, you will be mining without a reward.
Step 4 – Download The Miner
Now that you’re set up, you need to download the miner which you can download from https://miner.nicehash.com/. Make sure to verify the HTTPS and the website address matches nicehash.com
Step 5 – Enter Your Wallet Address
This is where you link the miner to your account by adding your wallet address to the miner. Start the miner, and after a while, the program will have loaded. Select the wallet tab and enter your wallet address.
Step 6 – Start Mining
Now all you have to do is click the start mining and if this is your first time the program will run some benchmarking to see how powerful your computer is. Once done it will select the most profitable mining algorithm. You will probably then have up to three windows. One is the miner GUI, one for the CPU mining and one for the GPU mining.
NiceHash
NiceHash is packed with cloud mining features making it convenient while buying GPU equipment. As per many NiceHash reviews, it is a great place to make crypto mining highly profitable. It is also used to mine new altcoins and stable coins. NiceHash helps us gain success in our crypto journey effortlessly.
Pros:
1. This Litecoin mining program allows you to manage all your activities remotely.
2. This Litecoin miner app enables you to check mining status with ease.
3. It allows you to conveniently manage your profile.
4. NiceHash offers a profitability calculator.
Cons:
1. Litecoin transfer fees are higher than other popular mining software.
How to Use?
Step 1 – Registration on NiceHash
Find your way to the NiceHash.com website click the registration button and register on the website by entering your email and password.
Step 2 – Confirm your email address
You will receive an email with a verification code and link. You can use either method to confirm your email.
Step 3 – Getting Your Wallet Address
Once you have confirmed your email address you need to log into the account with your credentials. You will then be presented with the dashboard screen and the wallet code is highlighted in the image above. You need to remember this code as it is used in the NiceHash miner program to link the miner to your account. Without this code, you will be mining without a reward.
Step 4 – Download The Miner
Now that you’re set-up, you need to download the miner which you can download from https://miner.nicehash.com/. Make sure to verify the HTTPS and the website address matches nicehash.com
Step 5 – Enter Your Wallet Address
This is where you link the miner to your account by adding your wallet address to the miner. Start the miner, and after a while, the program will have loaded. Select the wallet tab and enter your wallet address.
Step 6 – Start Mining
Now all you have to do is click the start mining and if this is your first time the program will run some benchmarking to see how powerful your computer is. Once done it will select the most profitable mining algorithm. You will probably then have up to three windows. One is the miner GUI, one for the CPU mining and one for the GPU mining.
IQ Mining
IQ Mining has one of the fastest withdrawal processing compared to other services. Minimum withdrawal is 0.001 BTC with no added fees.
Pros:
1. It helps you multiply your potential mining income.
2. It allows you to withdraw your money daily.
3. You can purchase contracts on this platform with ease.
4. Offers daily payouts with instant withdrawals.
Cons:
Less responsive customer care service.
How to Use?
Step 1 – Sign up
Fill in the form and get ready to start mining in under than 1 minute
Step 2 – Purchase a contract
Choose one of the most profitable contracts and start cloud mining
Step 3 – Get paid
Withdraw your mining income on a daily basis to your crypto wallet
Hashshiny
Hashing 24 does not host its own mining facilities or servers but rather, it chooses a reliable and reputable mining company (in this case, Bitfury) to serve its mining needs. It ensures the company provides warranties for its equipment and its maintenance.

Pros:
1. This Litecoin mining program helps you to decide which pools you want to mine.
2. Automatically performs the backup of the database.
3. You can control the mining process easily.
4. Offers payment solutions like PayPal and cryptocurrency wallets.
Cons:
1. Mining prices are higher than other mining companies.
How to Use?
Step 1
Visit Hashshiny.io and click on “Sign up”
Step 2
Complete the registration form and select “register”
Step 3
You will receive a mail to confirm your registration.
Step 4
Click on “buy hash” and select the amount of Hashrate you wish to buy.
Step 5
Receive Payout Everyday
StormGain
StormGain allows crypto trading with a multiplier up to x200, which is higher than most competitors. Though it seems attractive, beginners should be aware that high leverage can lead to as many losses as wins. Still, if you’re looking to trade big with minimal capital, then this broker is a good option.
Pros:
StromGain contains charting tools to track trends and price movements.
It helps you to access all the popular cryptocurrencies 24/7.
You can protect your cryptocurrency in a secure wallet.
It allows you to mine digital currency without using expensive equipment.
Cons:
It is not regulated mining software.
How to Use?
Step 1
Visit the website https://app.stormgain.com/ or click here to create.
Step 2
Click or tap the “Create an account” button or register via a social network in the registration page.
Step 3
Fill in the Email, Phone, and Password fields in the pop-up window. After this, confirm registration by clicking/tapping Continue.
Step 4
If you want to use Demo Account, just switch to Demo Account
Genesis Mining
Genesis Mining is a good cloud mining what I like the most is how easy it is to use it. Its board is intuitive and very easy to navigate. It is also very easy to make deposits and withdraw with this cloud mining.
Pros:
1. Helps you to mine any cryptocurrency mentioned in their catalog.
2. You do not need much technical knowledge to get started.
3. Provides periodic mining output directly to your wallet.
4. Ensures daily payouts for miners.
5. This Litecoin mining software helps you to mine multiple cryptocurrencies, including Ethereum, Litecoin, and Bitcoin.
Cons:
1. Does not offer good customer support.
How to Use?
Step 1 – Register with Genesis Mining
In your web browser, visit https://www.genesis-mining.com. Click Sign Up at the top-right. Enter your email address and password, then click Sign up at the Bottom. You’ll see a notification saying your account has been created.
Step 2 – Choose payment method
Once you’ve selected BTC as your payment method click Continue. Take a look at the Order Specification to double-check everything is in order. Next, click View Agreement, then Agree on Terms to accept the mining conditions. Finally click Confirm Order.
Step 3 – Process Bitcoin payment
If you chose to pay via Bitcoins, the Genesis website will provide a payment address and QR code to process your payment. This address is valid for 30 minutes. Make a note of both the address and the exact amount of BTC you’ll need to pay.
Hive OS
HiveOS is a great Linux OS for mining. It is not striped down like some of the other Linux mining OSs. I know Linux so that I can look at logs and debug problems, not that I have many. It even allows you set up a custom miner.
Pros:
1. This Litecoin mining tool provides notifications via Telegram and Discord.
2. It offers statistics on different algorithms and miners.
3. Automatically detects your mining rigs and adds them to your management dashboard.
4. It helps you to switch between pools and pool servers.
5. You can keep your GPU near the target temperature.
Cons:
1. You can mine only three cryptocurrencies.
How to Use?
Step 1
Creating An Account
Step 2
Adding Your Workers (Farm Hash, Manual Setup)
Step 3
Choosing An Installation Type (GPU — installs the OS on GPU based rigs, ASIC — installs the OS on ASIC miners)
Step 4
Downloading The Image
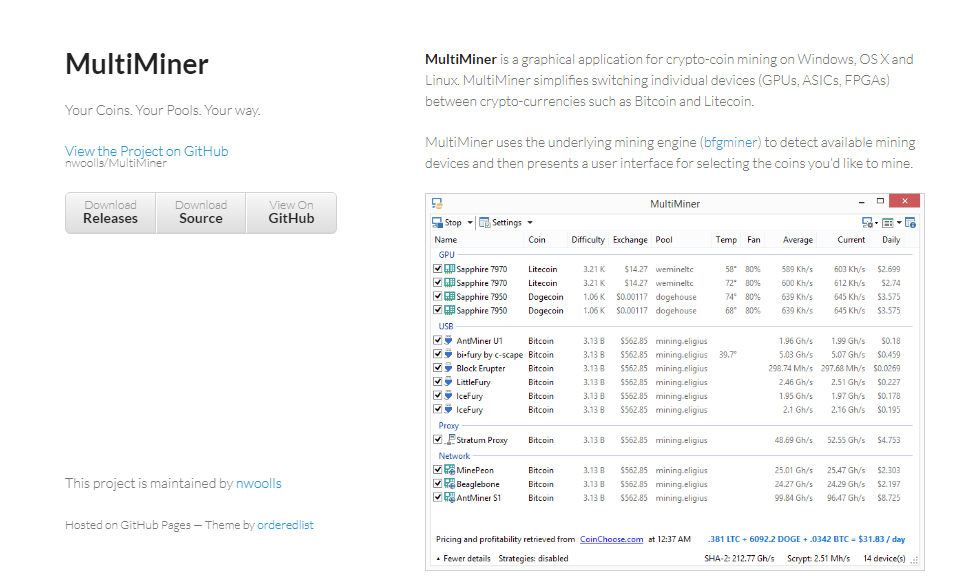
MultiMiner
MultiMiner was designed from day one to cater to both new miners and power users. From the Getting Started wizard to MultiMiner Remoting, you can be certain you’ve found the Bitcoin mining software to fit your needs.
Pros:
1. Provides a notification alert when it is profitable to consider mining.
2. It helps you to monitor, configure, and control any MultiMiner rig available on the network.
3. It is one of the best free Litecoin mining apps that offer Wizard to get started.
Cons:
1. Fewer customization options for advanced users.
2. You need additional software for Linux and macOS.
How to Use?
Step 1
Download and extract the zip file at the GitHub Releases page
Step 2
Install BFGMiner
Step 3
Install X11
Step 4
Install the latest version of Mono for your OS.
Step 5
Run MultiMiner.Win.exe using mono: mono –arch=32 MultiMiner.Win.exe
Read More: Litecoin Mining Pool – How To Mine Litecoin